How to Configure DNS Records with Google Domains
Guide to Configure DNS Records with Google Domains
Configuring Mailazy DNS records with Google Domains is simple and easy. By confugring DNS records with Google Domains, Mailazy associates DKIM and SPF records to your domain which allows Mailazy to send signed and authorized emails from your domain.
We need to add the CNAME records in DNS setting of domain provider to verify the domain. In order to configure the Mailazy’s DNS records with Google Domains follow the given steps.
Did you know: It takes only 5 mins to configure Mailazy DNS settings!
1. Get your Mailazy CNAME Records
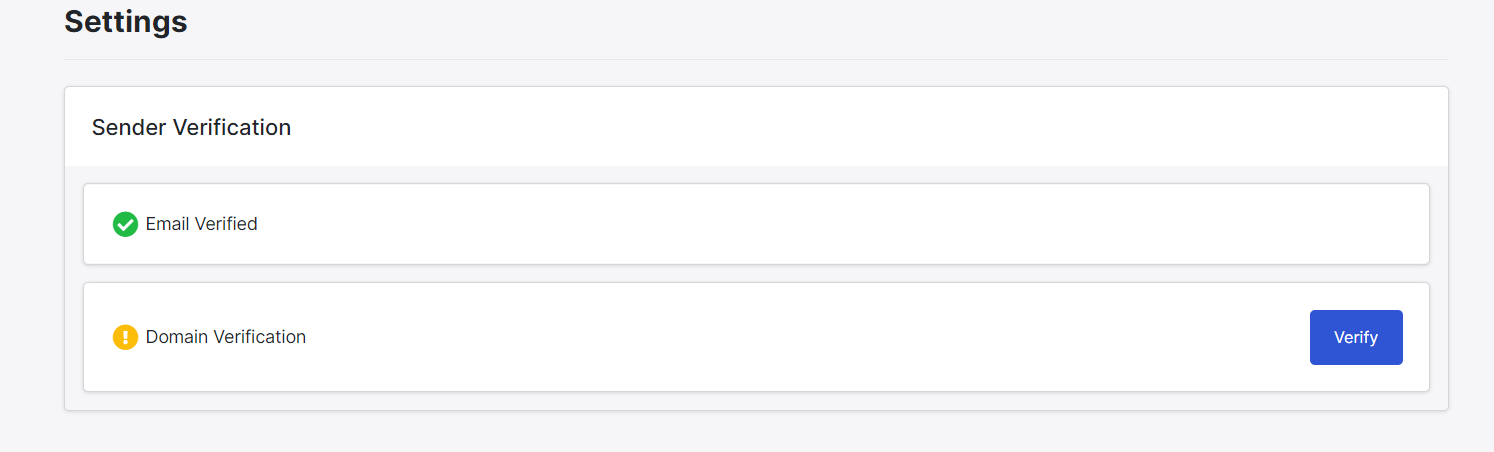
- Goto setting tab in Mailazy dashboard
- Click on Verify Button.
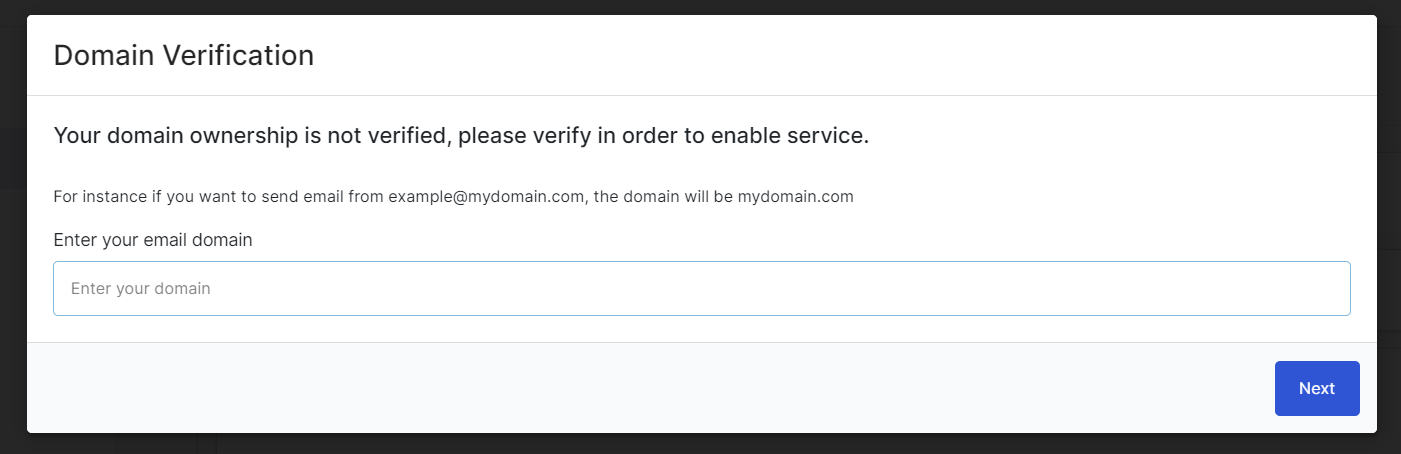
- Add the Domain and Click on Next Button
- Now you get the sender domain verification CNAME
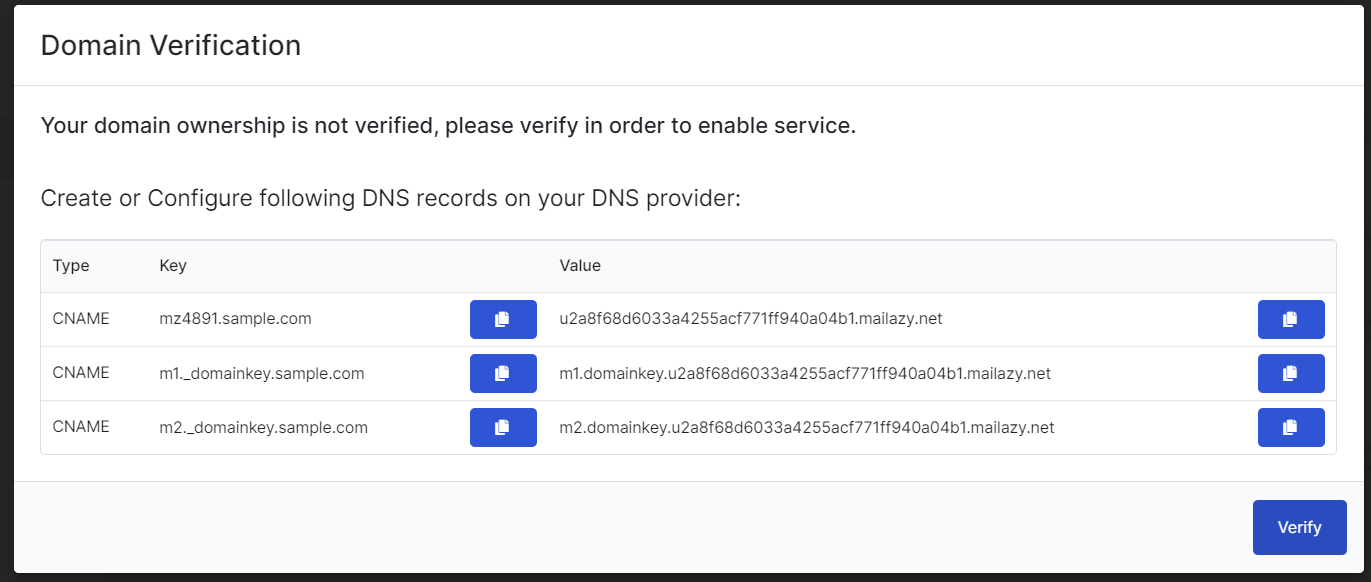
- These CNAME should add to Google Domains DNS settings
2. Configure Records
- Login to Google Domains account
- Once you sign in it will show the all domain list of you purchased in My Domain menu.
- Click on the domain name which you want to use for mailazy’s email API.
- Click the manage button to access the domain settings.
- Click on DNS
- Add the custom resource record
- Select the CNAME option from the Type drop-down menu.
- Add new CNAME record
- Add the CNAME Record Key and Value which are given on Mailazy dashboard
- Enter the desired TTL value into the TTL field. The recommended value is 14400.
- Click on the Add button.


3. Verify or Validate DNS Records
- After adding the CNAME records in Google Domains.
- Come back to Mailazy Dashboard and Click on Verify button.
- Now the sender domain verification complete when get the green tick on domain verification.
- If the domain is not verified then wait for some time. It may take a few hours to verify the domain.